
The equipment set for building strings is short. Most of what is on it can be built at a bench with basic tools. The catch is that every piece of equipment has one job — to hold a precise, measurable tension — and it is the word measurable that separates a working setup from a setup that will lie to you at the moment the truth matters most.
There are companies that sell purpose-built string-building jigs. They are excellent, and they are expensive. A well-built shop-made jig will match them on every measurement that matters. Below is what I built for my first setup, along with the bare minimums each piece has to hit.
The main string-building jig
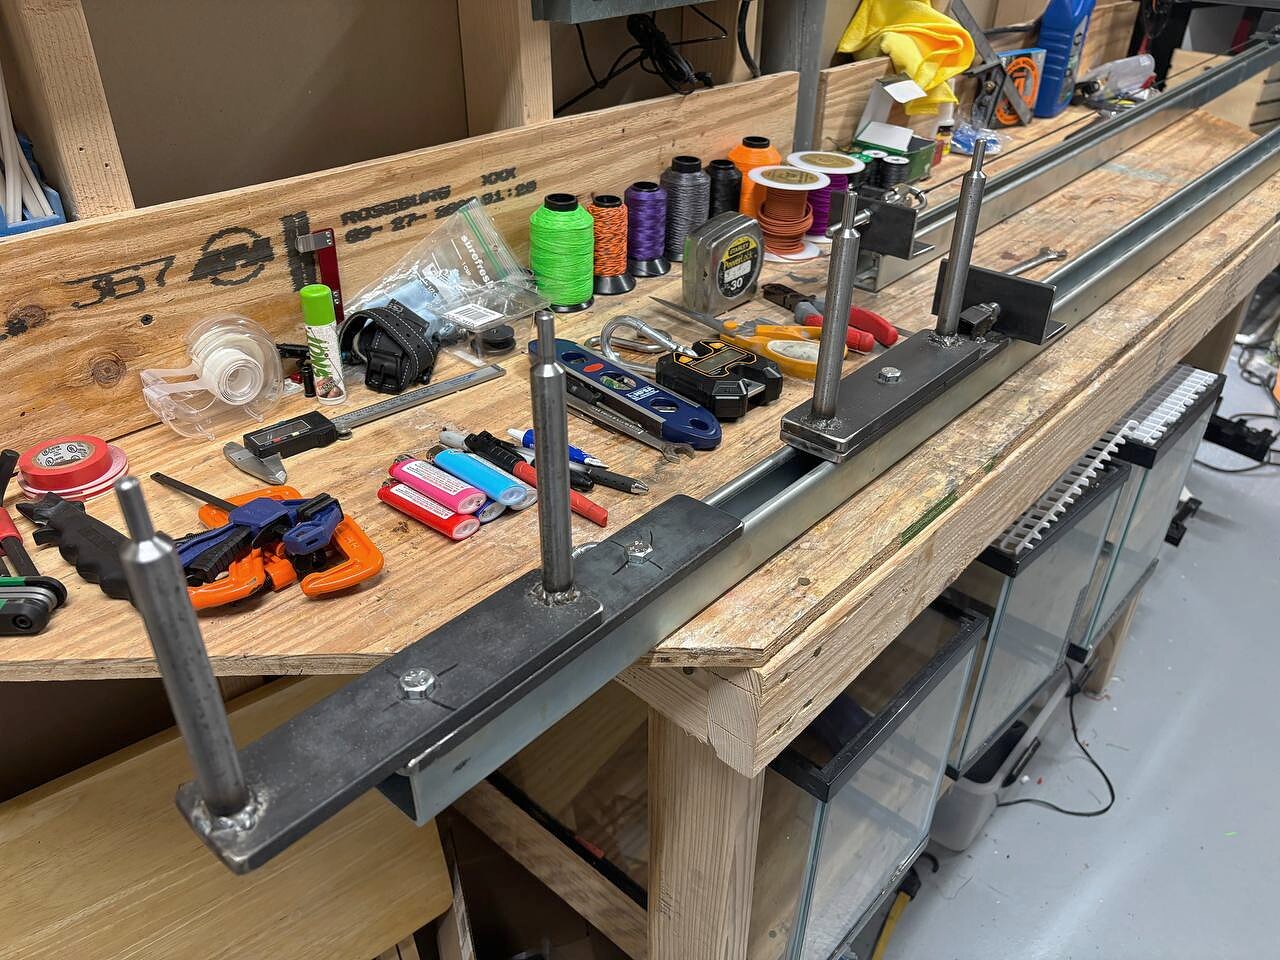
The main jig has three jobs. Hold a set of strands at a known length. Apply and hold a known tension against those strands. Give the builder access to both ends of the string at the right time in the process. That is it.
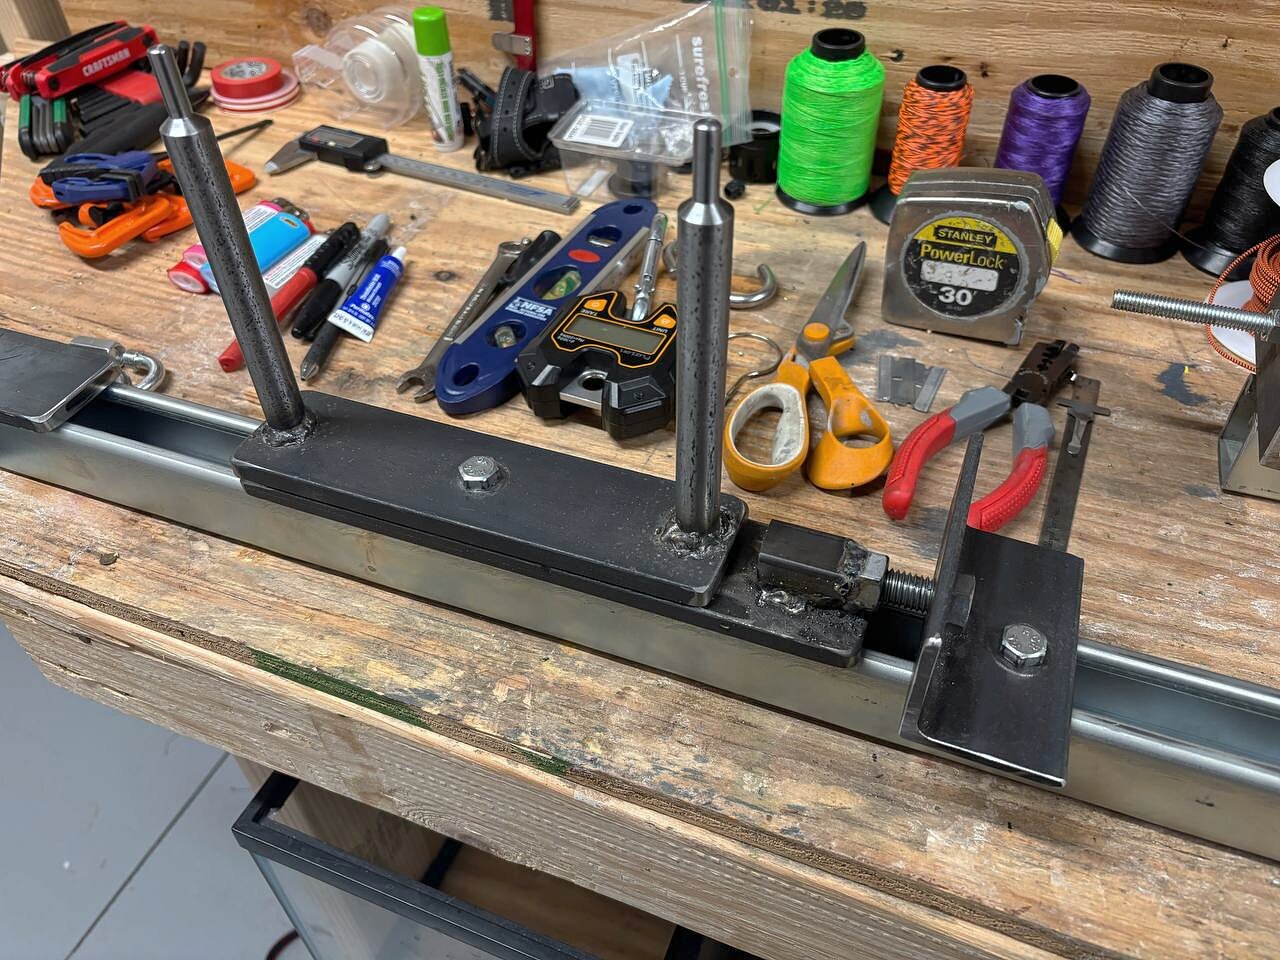
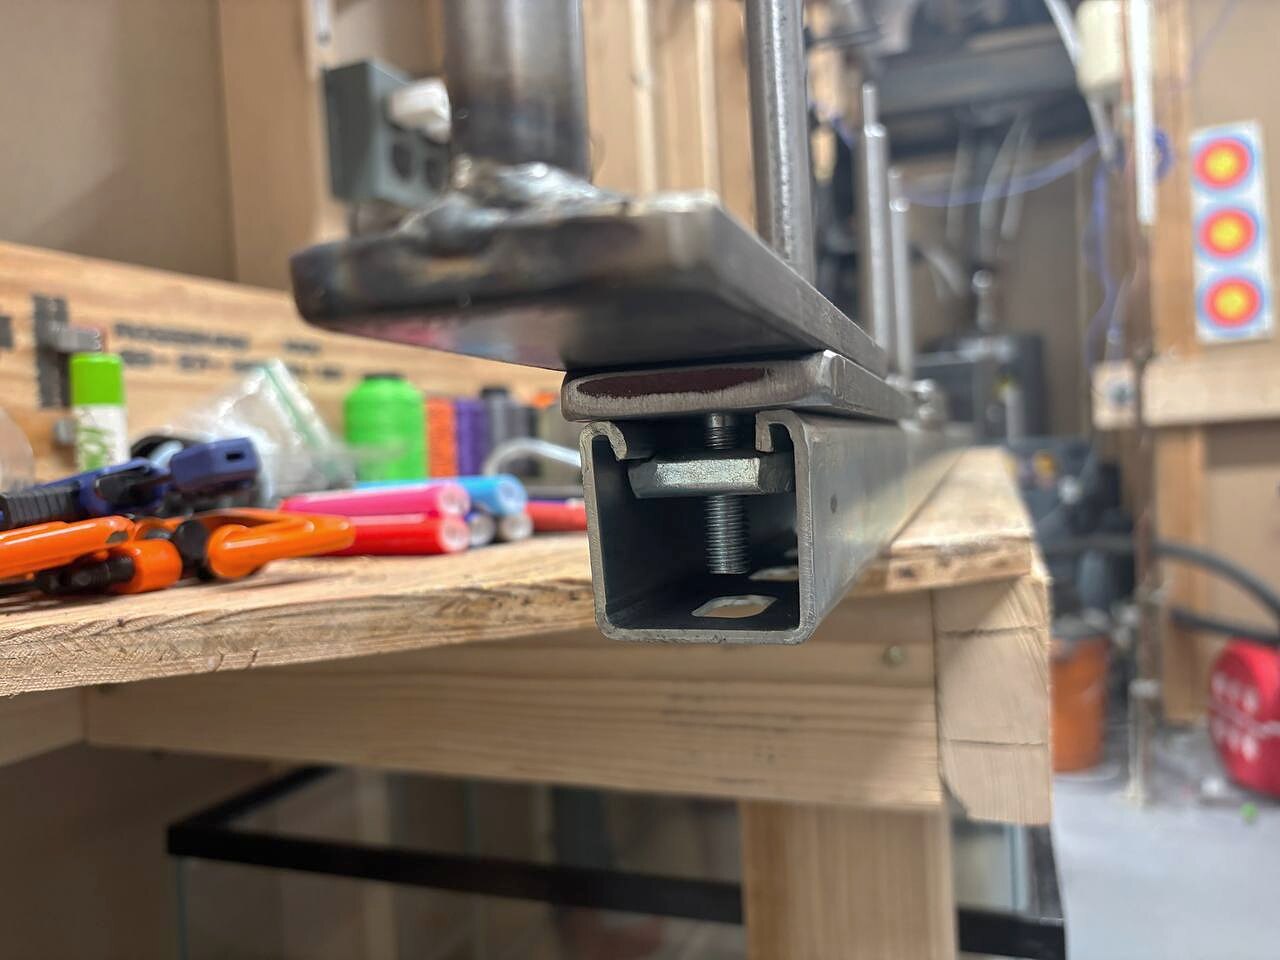
A serviceable jig can be built from unistrut, unistrut clamps, quarter-inch steel plates, and steel rods. It must be able to withstand at least 400 lb of applied force without deflecting, and it needs a real clamping mechanism to apply that force. Tension is the point of the tool. If the tension is not accurate, nothing downstream of it will be either.
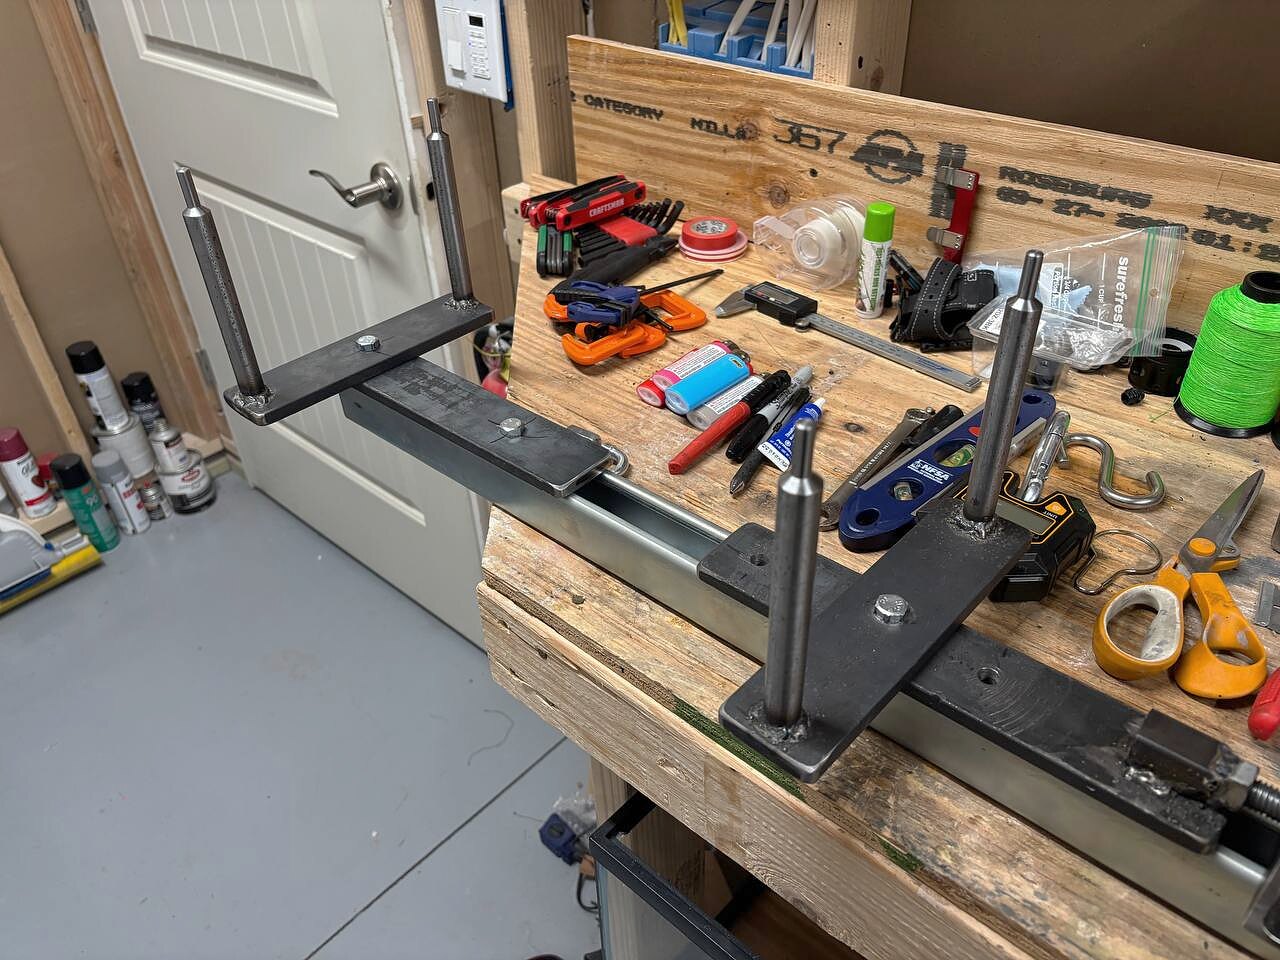
A traditional jig has two rods on each end and a pivoting center point. The pivot lets the builder set the initial length between two rods, then rotate the end pair once the layup is complete for tag-end serving. Some builders use two-rod jigs without a pivot — that is the layout the Mathews open-loop system relies on. It works, but it can be challenging to complete proper tensioning on, and it does not work equally well on all bows. Part 2 covers that discussion. For most builders, the pivoting design is worth the added complexity.
The post diameter matters less than the tension mechanism, but for reference it should be roughly 3/8". On the homemade jig pictured, I used 5/8" steel bar and turned the upper rods down to dimension on a metal lathe. The layup measurement is always taken outside-to-outside of the posts, never center-to-center — so the post diameter is baked into the numbers as long as the same posts are used throughout the build.
The pre-tension / stretching jig
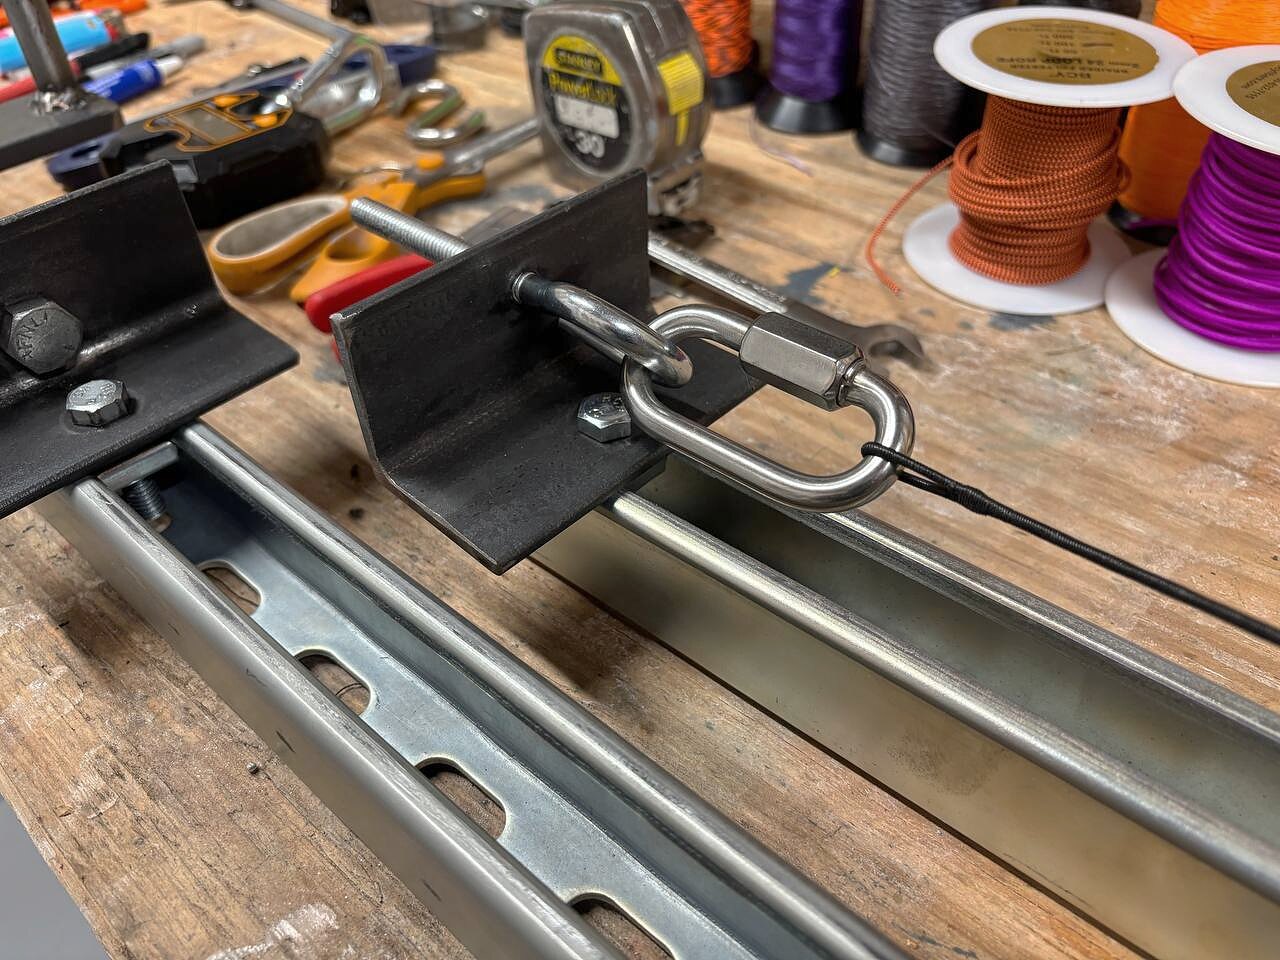
Every string build passes through the tensioning stage at least twice. Once after twisting, to seat the bundle. Once after serving, to lock in the final length. Both stages are held at a known load for a known length of time.
A dedicated pre-tension jig — a length of unistrut with a hook on each end and a way to apply and read a specific weight — is not strictly required. It is simpler than the main jig and it takes an afternoon to build.
The real value of the second jig is running two strings in parallel. One string can be sitting under load while another is being twisted or served on the main jig. Without it, the build slows down every time a string needs to rest.
Serving jig
An adjustable-tension serving jig is a required tool. The tension on the serving jig sets the pressure with which the serving material lays down against the string, and that pressure decides how tight and how uniform the finished serving will be. A serving jig that cannot hold a consistent tension will produce servings that shift after installation. There is no way to hide that in the finish.
Small tools
The rest of the bench is short. Sharp scissors. A fresh razor blade. A lighter.
The lighter is for sealing the cut ends of serving material — a job the lighter does cleanly and that any other tool does poorly. The razor blade replaces itself every couple of builds. Nothing costs less than a fresh razor, and nothing quietly costs more than a dull one dragging through a finished string.
Strand separators
Puck-style strand separators — the star-shaped or disk-shaped tools placed on the posts to keep colors organized during twisting — are optional at best. They do exactly what they claim to do, which is keep specific strands in specific positions. The trade is that they force the bundle into a geometry the strands themselves would not have chosen, and they concentrate the twist unevenly along the length of the string. The result is a bundle that looks organized and is quietly less stable than one allowed to find its own helical form.
Wooden sticks between the strands are gentler than pucks. They hold color separation without dictating the twist distribution, though they still introduce a bias. For a tournament bow, the cleanest bundle comes from a single color, no separator, and letting the strands seat naturally as the twist goes in.
Storage
After the string is built, before it goes on the bow, it has to sit somewhere. This is one of the smaller-looking decisions in the process and one of the more consequential ones.
For high-end target sets, linear storage is measurably better than a coiled bag. A string packaged coiled will open up along the coil radius, and the outer fibers of the coil can shift. Whether they reseat to their original geometry when the string is next put under load is uncertain. Usually they do. Not always. Some manufacturers ship high-end target strings on drums for exactly this reason. Most others tie the ends and drop the string in a Ziploc bag, and the string reseats on install more often than not. For our tournament sets, strings are stored linearly on a Unistrut rack until they go on the bow — which is one of the quiet benefits of making your own strings.
For a builder shipping strings to customers, the linear-versus-coiled choice is a real conversation about what the string is being sold for. For a builder installing their own, hang the string straight and keep it that way until it goes on the bow.
The jig, in detail
← Back to String Building · Next → Part 2 · Layout & length planning
Published 2026-07-04 · Axial Bowstrings