The wrong way to set cam timing is the way most archers try to do it — twist the cables until arrow flight cleans up, then declare the bow timed. Occasionally that produces a bow that shoots well. What it never produces is a bow with correct timing. What actually got adjusted, that time, was probably something else: nock travel geometry, cam lean, a shift in dynamic spine as the string balance changed. The arrow flight improved, the cables moved, and timing got credit for a fix it did not perform.
The problem shows up a few weeks later, when a different variable drifts and the arrow flight changes again. The same archer twists again. Over months, this drift ends in a bow timed to nothing sensible and every subsequent adjustment harder than the last. The correct posture is simple: timing is set on the draw board, verified statically under load, and never adjusted from behavior seen at the target. If timing is right on the draw board and arrow flight is off, the problem is not timing. Look elsewhere.
What timing actually is
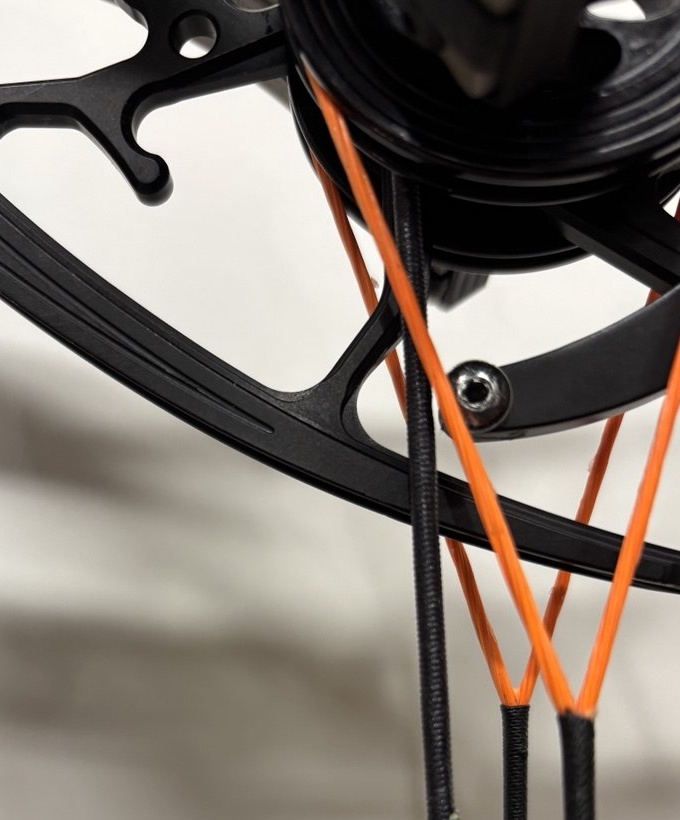
Both cams on a compound bow rotate through their profile as the string is drawn. Each finishes its rotation when the cam contacts its draw stop — the mechanical hard point where the cam cannot rotate further. Timing is a description of when each cam arrives at that stop relative to the other.
When timing is correct, both cams reach their stops in a defined relationship — either simultaneously, or with one cam leading the other by a specific manufacturer-defined amount. The string is pulled equally on release and nock travel through the shot is linear. When timing is off, one cam finishes its work before the other, the string leaves one cam ahead of the other, and the nock takes a curved path through the shot.
That curved nock path is the only thing timing exists to prevent.
Setting timing on the draw board
A draw board is a mechanical fixture that pulls a bow through its cycle under a slow, measured, controlled load. It gives the technician what shooting cannot: the ability to watch each cam approach its stop, one degree at a time, and see exactly when each one arrives. No form, no release, no arrow, no rest, no target. Just the bow and the load. That isolation is why the tool exists.
The procedure:
1. Hook the bow to the draw board. Confirm the bow is level and the draw board is pulling square to the string.
2. Draw the bow slowly through its cycle. Do not rush. The whole value of the tool is that it lets you observe what a live draw cannot.
3. Watch the top cam and the bottom cam as each rotates toward its stop.
4. Compare to the manufacturer's spec. On most modern compounds, the target is either simultaneous contact or a small defined offset. Verify against the bow's tuning manual before adjusting anything.
5. If timing is off, twist or untwist the control cables — typically the buss cable and, on yoked systems, one or both yoke legs. One twist moves cam timing by a small, measurable amount; the exact figure varies with cable length and cam design. Which cable to touch is a decision based on the rest-position cam marks and the current ATA of the bow.
6. Return the bow to rest, shoot the bow a few times, then re-draw and re-check. Verify under load, every time.
7. Continue until both cams meet spec within the working tolerance for the bow.
The common default: bottom cam first, by 1/16"
Always confirm the manufacturer's tuning spec first. Some bows have a specific timing target in their tuning manual, and that number wins over any general rule.
When the manual does not clearly specify, Axial's default is 1/16" bottom cam first — the bottom cam contacts its draw stop when the top cam still has about 1/16" of remaining travel. The balance of the bow with stabilizers, and the fact that the arrow is not sitting on the dead center of the riser, is what this offset compensates for.
Measurement convention
Before turning a single cable, get the reference frame straight. On a bow with the typical bottom-cam-first spec, timing is measured by the top cam's position at the exact moment the bottom cam contacts its stop. That is the reference frame. The bottom cam touching is the marker. The 1/16" is the top cam's remaining gap at that instant.
Every twist adjustment is a change to that gap. If someone tells you their bow is "1/16" out," they should be able to point at the same instant on the draw board and show you which direction.
Fine tuning: hard shots versus soft shots at the target
Once the draw board says the bow is timed to spec, the finishing check happens at the target — not at the back wall by feel, but at the target, by group position. The technique is a controlled comparison between two shot styles, and it is the one legitimate at-target diagnostic for timing.
1. Shoot several hard-pull shots. This is the archer's normal back-tension shooter style — a strong, committed pull into the back wall. Sight the bow in for these shots. This becomes the baseline.
2. Now shoot several soft-pull shots. Same aim, same form, but hold soft into the wall — the kind of shot that feels like it wants to run away from you before it fires. This is the diagnostic condition.
3. Compare the two groups vertically.
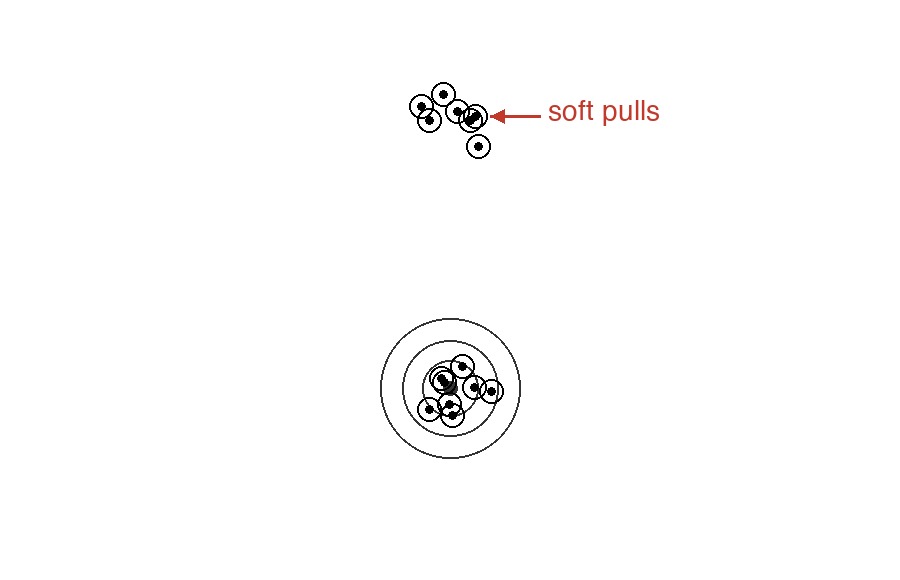
If the soft shots consistently hit the same vertical position as the hard shots, timing is correct. Stop.
If the soft shots consistently hit high, the top cam needs to be advanced — the gap at the moment the bottom cam touches needs to be smaller.
If the soft shots consistently hit low, the top cam needs to be slowed — the gap at the moment the bottom cam touches needs to be larger.
The reasoning: a hard-pull shot fires with the string leaving both cams at their fully seated positions. A soft-pull shot fires slightly earlier in the cam's travel — before both cams have fully settled. If timing is right, that offset is small and vertically neutral. If the top cam is leading or lagging its intended position, the soft-pull shot exposes it, and the arrow shows the error vertically. This direction mapping is Axial's field method — a shop rule of thumb, not a manufacturer-published diagnostic — but it is a reliable one.
Once you have run this test, the value of perfect timing becomes obvious if your goal is under-1" groups — a minor timing mismatch that would be invisible at the back wall shows up as several inches downrange, right in front of you.
Every twist made during this stage is small. Verify each adjustment on the draw board to confirm the timing number is still within the working spec, then return to the target and re-shoot both groups.
Why general arrow flight is the wrong feedback signal
The hard-versus-soft check above is a controlled, deliberate comparison designed to expose one specific error mode. That is not the same as chasing tuned arrow flight with cable twists, which is what most archers do and what most archers should stop doing.
Every archer has watched a fletched arrow come out of a bow with vertical fishtail or porpoising, twisted a cable, watched the arrow clean up, and concluded timing was the problem. Sometimes it was. Usually it was something else that moved when the cable twisted.
Arrow flight is downstream of every single tunable variable on the bow: rest position, center shot, nock height, D-loop position, arrow spine, arrow rest damping, cam lean, and — yes — cam timing. When any one of those is off, arrow flight degrades. When any one of them is changed, arrow flight changes. That is why chasing arrow flight with cable twists sometimes appears to work: the change happens to shift a different variable back into range, and the archer credits timing.
Published 2026-07-04 · Axial Bowstrings